
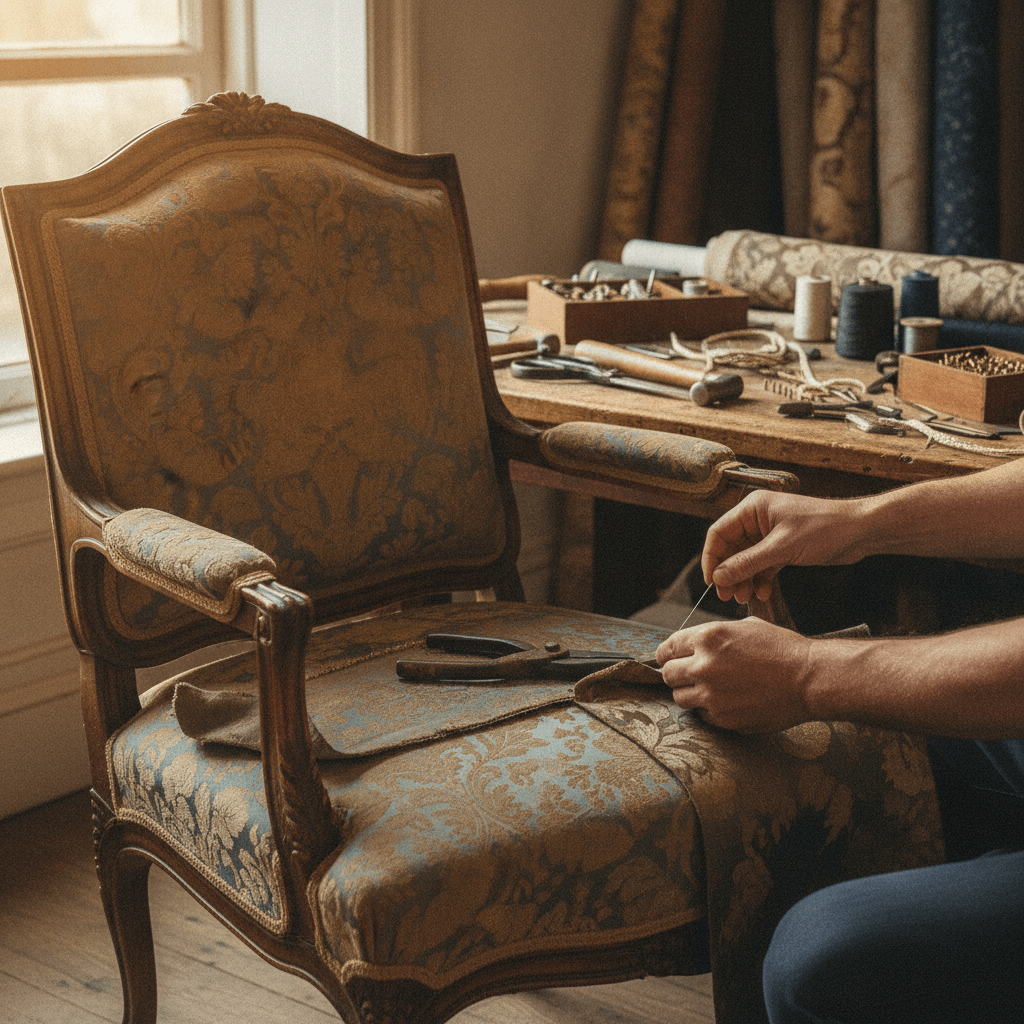
Restoring Antique Furniture Fabric Surfaces
Antique furniture holds a truly special place in our homes and hearts. These pieces are more than just items of decoration, they are tangible links to the past. Each scratch, faded pattern, or worn fabric tells a silent story of generations who used and loved them.
I find immense satisfaction in preserving these stories. Restoring antique furniture fabric surfaces can breathe new life into an old piece. It also keeps its unique character intact.
This guide will walk you through the careful steps needed to restore these cherished fabric surfaces. We will cover everything from initial assessment to crucial care tips. I believe with the right approach and a bit of patience, anyone can bring back the beauty of these historical treasures.
Understanding Antique Fabric Surfaces
Before any restoration work begins, it is important to deeply understand the fabric you are working with. Antique fabrics differ widely in composition and weave. Each type reacts differently to cleaning agents and repair techniques. A careful assessment is your first line of defense against accidental damage.
You need to look closely at the fibers. Note the weave and how much wear and tear the fabric has. This initial examination helps determine the best course of action.
Identifying Fabric Types
Many types of fabrics were popular for antique furniture. Silk was often used for its luxurious feel and sheen, but it is extremely delicate. Velvet, with its plush pile, can show wear easily. Wool and linen are sturdier, but they can shrink or stiffen if treated incorrectly.
Damask and brocade feature complex woven patterns. These patterns require special care because of their intricate designs. Knowing if you have natural fibers like cotton, silk, or wool, or if there is a blend, is important. Synthetic fibers were not common in true antiques, but some newer “antique-style” pieces might have them.
Assessing Damage and Condition
I always start by thoroughly examining the fabric’s condition. Look for obvious issues such as tears, holes, and fraying. Note any areas of severe discoloration or fading. Stains are a common problem, and identifying their type can guide your cleaning efforts.
Check the overall structural integrity of the fabric. Is it brittle? Does it shed fibers easily? Sometimes the fabric is too degraded for simple repairs. If the fabric is original and extremely fragile, professional consultation is usually best. This initial assessment helps you decide if a repair is possible for your skill level.
Essential Supplies for Fabric Restoration
Having the right tools and materials is half the battle when you are restoring antique fabrics. I always recommend gathering everything you need beforehand. This prevents interruptions and ensures a smooth process.
Choosing gentle yet effective products is key for delicate antique textiles. Avoid harsh chemicals that could cause irreversible damage.
Cleaning Agents and Tools
For cleaning, you will need a few basic items. A soft-bristled brush or a lint roller is good for initial dust removal. For deeper cleaning, specialized upholstery cleaners designed for antique or delicate fabrics are ideal. Always patch test these products in an inconspicuous area first.
Distilled water is preferable for mixing solutions and rinsing, as it does not leave mineral deposits. Clean, soft cloths or sponges are important for applying and blotting. A handheld steamer on a very low setting can also help refresh certain fabrics, but use it with extreme caution.
Repair Materials
When it comes to repairs, a fine needle and a variety of threads are essential. Try to match the thread color and fiber content as closely as possible to the original fabric. For heavier fabrics, a curved upholstery needle can make the job easier.
Fabric adhesive designed for textiles can be useful for securing small tears or fraying edges. You might also need small patches of similar fabric, perhaps from a hidden area of the furniture, for more significant repairs. Always ensure any adhesive or patch fabric is acid-free and compatible with the antique material.
Step-by-Step Cleaning Techniques
Cleaning antique fabric surfaces needs a very gentle touch. I approach each piece with the understanding that its age makes it fragile. Haste can lead to damage, so I take my time with every step.
The goal is to remove dirt and refresh the fabric without causing any harm to its fibers or color.
Gentle Dust and Debris Removal
Start by carefully removing all loose dust and debris. I use a soft-bristled brush, moving in the direction of the fabric pile. For fabrics like velvet, this helps lift the pile and remove trapped particles. A low-suction vacuum cleaner with an upholstery attachment can also be effective.
I like to cover the vacuum attachment with a piece of mesh or a clean stocking. This prevents accidental suction of loose threads. It also creates a barrier between the fabric and the vacuum. Go slowly and methodically over the entire surface.
Spot Cleaning and Stain Treatment
For spot cleaning, identify the type of stain if possible. For fresh spills, blot immediately with a clean, dry cloth. Do not rub, as this can spread the stain and push it deeper into the fibers. For older stains, a small amount of an appropriate upholstery cleaner can be applied to a clean cloth.
Dab the stain gently, working from the outside edge inward. Always use minimal moisture. After treating a stain, blot the area with a damp cloth containing only distilled water to remove any cleaner residue. Let the area air dry completely before proceeding or sitting on the furniture.
Repairing Minor Fabric Damage
Minor damage to antique fabric surfaces can often be repaired with a careful hand. This process is about stabilizing the fabric and preventing further deterioration. It also helps restore the aesthetic appeal of the piece.
I find that patience is your most valuable tool here. Rushing can make small issues much worse.
Mending Small Tears and Holes
For small tears, I use a fine needle and matching thread. If the tear is straight, you can bring the edges together with a slip stitch. This creates an almost invisible mend. For holes, a small patch from a hidden area of the furniture or a similar vintage fabric might be needed. Place the patch underneath the hole.
Then carefully stitch the edges of the original fabric to the patch. The key is to make your stitches as small and unobtrusive as possible. This maintains the fabric’s original appearance. Fabric adhesive can also secure frayed edges before stitching. But only use a very small amount.
Reattaching Loose Threads
Loose threads are common on older upholstered pieces. If a thread is simply pulled, you can often use a needle to carefully push it back into the fabric weave. For threads that have broken free, you might need to secure them with a few small, matching stitches. Always trim excess loose threads very carefully. Do not pull them, as this can unravel more of the fabric.
Sometimes, a light application of fabric glue on a very small brush can help secure a stubborn loose thread to its backing. This method needs precision and a light touch. It prevents the glue from showing through the fabric.
When to Seek Professional Help
There are times when the damage to antique furniture fabric is beyond a DIY fix. Recognizing these situations is a sign of good judgment. It protects the integrity and value of your cherished piece. I always recommend professional help for specific challenges.
This is especially true when the original fabric is extremely rare or the piece has significant historical value. Do not risk further damage by attempting complex repairs you are not equipped to handle.
Recognizing Complex Damage
Severe fading or large areas of fabric deterioration are often too complex for home repair. If the fabric has dry rot, significant mildew, or extensive moth damage, it might require specialized treatment or complete re-upholstery. Dealing with delicate or very old silk, velvet, or embroidered fabrics also often calls for expert hands.
These materials can easily be damaged by improper handling or cleaning solutions. If the furniture itself needs structural repair, like a broken frame, professionals can often coordinate fabric restoration alongside woodworking or structural fixes. This ensures a cohesive and lasting repair.
The Value of Expert Restoration
Professional restorers have the expertise, tools, and materials to handle even the most challenging antique fabric issues. They can match obscure fabric patterns, use specialized cleaning agents that are safe for delicate fibers, and employ techniques that preserve the historical accuracy of the piece. Their work often increases the value and longevity of your antique furniture. They understand the nuances of various eras and fabric compositions. When you need comprehensive furniture repair that includes delicate fabric work, you can find expert services at https://azcouchcare.com/furniture-repair-scottsdale-az/. They specialize in a wide array of furniture care, ensuring your pieces receive the attention they deserve.
Preserving Your Restored Antique Fabrics
After successfully restoring your antique furniture fabric, the next step is crucial. You must protect it from future damage. Proper care and maintenance ensure its beauty lasts for many more years.
This long-term preservation strategy is just as important as the restoration itself. It keeps the fabric in good condition and slows down the aging process.
Routine Maintenance Tips
I always advise regular, gentle cleaning. Dust can be abrasive, so use a soft brush or a low-suction vacuum with a soft attachment once a week. Avoid direct sunlight, as UV rays can quickly fade and weaken antique fabrics. Position your furniture away from windows or use curtains and blinds to filter light.
Rotate cushions periodically to ensure even wear. Address spills immediately by blotting, not rubbing, with a clean cloth. For furniture that sees a lot of use, consider custom-made protective covers that are breathable and soft. These small steps make a big difference.
Environmental Control
The environment plays a huge role in the longevity of antique fabrics. Extreme fluctuations in temperature and humidity can cause fibers to degrade. High humidity encourages mold and mildew growth. Very dry conditions can make fibers brittle.
I recommend maintaining a stable room temperature between 68 and 72 degrees Fahrenheit. Keep humidity levels between 45% and 55%. Using a humidifier or dehumidifier can help control these conditions. Ensure good air circulation around your furniture. This prevents moisture buildup and keeps the fabric fresh. Proper environmental control is a silent guardian for your restored antiques.
Bringing History Back to Life
Restoring antique furniture fabric surfaces is a rewarding endeavor. It connects us to the craftsmanship of the past and enriches our living spaces. We have explored everything from understanding different fabric types to the essential tools needed for careful cleaning and repair. We also talked about when it is best to call in the professionals for those trickier jobs. Remember that patience, attention to detail, and the right techniques are your best allies in this process.
Whether you are mending a small tear or tackling a stubborn stain, each step you take helps preserve a piece of history. These pieces are not just old furniture they are heirlooms. They carry stories and a unique character that modern items simply cannot replicate. Keeping them in good condition means honoring their past and ensuring they can continue to tell their tales for future generations.
I encourage you to embrace the challenge and satisfaction of restoring your antique fabric. With careful maintenance and a proactive approach, your cherished pieces will maintain their beauty and integrity. Take pride in your efforts to preserve these valuable treasures for years to come.